How to Connect Binance to Koinly Using API: Complete Step-by-Step Guide
This article contains affiliate links. If you sign up for Koinly through a link on this page, I may earn a commission at no extra cost to you. I only recommend tools I have genuinely evaluated.
This article is for informational purposes only and does not constitute professional tax or financial advice. Tax laws vary by country and change frequently. Consult a qualified tax professional for advice specific to your situation.
If you trade on Binance and your Koinly tax report is missing transactions, showing incorrect gains, or simply not reflecting your full trading history — the connection between the two platforms is almost certainly the problem. Getting how to connect Binance to Koinly using API right is the single most important setup step for any Binance trader using Koinly for tax reporting. Do it incorrectly and your entire tax report is built on incomplete data.
The connection process is straightforward when you know exactly what to do — and what to avoid. The most common mistakes happen at the permissions stage, where traders either give too much access or miss a required permission that causes transactions to silently not import. Both problems are completely preventable.
After 30 years in finance, I have seen how costly incomplete tax records can be — especially as IRS enforcement of crypto activity increases and global reporting frameworks like CARF and DAC8 expand. Getting your Binance data into Koinly correctly is not a technical exercise. It is a compliance requirement.
By the end of this guide, you will have Binance fully connected to Koinly with a secure read-only API key, your transaction history importing correctly, and a clear process for verifying that nothing has been missed.
Quick Answer
To connect Binance to Koinly using API: log into Binance, go to API Management, create a new API key labelled “Koinly Tax API”, enable Read Only permissions only, and disable all trading and withdrawal permissions. Copy both the API Key and Secret Key immediately — Binance only shows the Secret Key once. Then log into Koinly, go to Wallets, click Add Wallet, search for Binance, and paste both keys. Koinly will begin syncing your full transaction history automatically. The entire process takes under ten minutes.
If you want to follow along, Koinly’s free plan lets you import your full Binance history and review it before you pay anything.
Why API Connection Is Better Than CSV for Binance
Before walking through the steps, understanding why API is the correct method for Binance saves you time and prevents problems later.
CSV exports from Binance are manual, static snapshots. Every time you make a new trade, you need to export a new file, reformat it if necessary, and re-upload it to Koinly. For active traders making dozens of transactions per week, that process is unsustainable — and the risk of missing a file or uploading a duplicate is high.
API connection is live. Once configured, Koinly pulls your Binance transaction history automatically and continues to sync new trades as they happen. You connect once and the data stays current. For anyone trading regularly on Binance, API is not the more convenient option — it is the only option that produces reliably accurate tax reports.
CSV does have one legitimate use case: if you closed your Binance account and need to import historical data that is no longer accessible via API, a CSV export is the correct fallback. For active accounts, use API every time. The IRS treats all crypto transactions as taxable events — meaning every trade, swap, and reward on Binance needs to be in your records regardless of how it is imported.
How to Connect Binance to Koinly Using API: Step-by-Step
Step 1: Log Into Binance and Open API Management
Log into your Binance account and click your profile icon in the top right corner. From the dropdown menu, select API Management. If you cannot see it immediately, look under Account Settings — Binance occasionally updates its navigation layout.
You will see a list of any existing API keys on this screen. Create a dedicated key for Koinly rather than reusing an existing one — this keeps your API keys organised and makes it easy to revoke access cleanly if you ever need to.
Step 2: Create a New API Key
Click Create API. Binance will ask you to choose between a System Generated key and a Self Generated key — choose System Generated unless you have a specific reason to do otherwise.
Enter a label name. Use something specific like Koinly Tax API — this makes it immediately clear what the key is for when you review your API list later. Vague labels like “API 1” create confusion when you are auditing your security settings in future.
Complete the security verification — Binance will require 2FA, email confirmation, or both depending on your account security settings. Once verified, Binance generates your API Key and Secret Key.
Copy both keys immediately and store them temporarily in a secure note. Binance shows the Secret Key only once. If you close this screen without copying it, you will need to delete the key and create a new one. This is the most common mistake at this stage — do not skip it.
Step 3: Configure API Permissions — This Step Is Critical
This is where most connection problems originate — and where the most important security decision is made. Get this step right and everything else follows cleanly.
Inside the API key settings, you will see a list of permission toggles. The correct configuration for Koinly is:
Enable only: Read Only (sometimes labelled “Enable Reading” or “Can Read”)
Disable everything else: Spot and Margin Trading, Futures Trading, Withdrawals, Internal Transfers, and any Universal Transfer permissions must all be turned off.
Koinly only needs to read your transaction history. It does not need — and should never have — the ability to trade, withdraw, or move funds. A read-only API key means that even if your Koinly credentials were ever compromised, no one could access or move your Binance funds. This is the correct security posture for any third-party tax tool.
If you trade Binance Futures, you will also need to enable the Futures read permission specifically — it is sometimes listed separately from the standard spot read permission. Check both. Missing this is the most common reason Futures trades fail to appear in Koinly.
For a broader look at Koinly’s security approach and how it handles API connections across all exchanges, our Is Koinly Safe? guide covers the platform’s security architecture in detail.
Step 4: Add Binance as a Wallet in Koinly
Switch to Koinly and log in. Go to Wallets and click Add Wallet / Exchange. In the search box, type Binance.
Pay attention to which Binance option you select. Koinly lists multiple Binance versions — Binance, Binance US, Binance Futures, and sometimes regional variants. Select the version that matches your account. If you trade both spot and futures on the same account, you may need to add Binance twice — once for spot and once for futures — depending on how Koinly handles your specific account configuration.
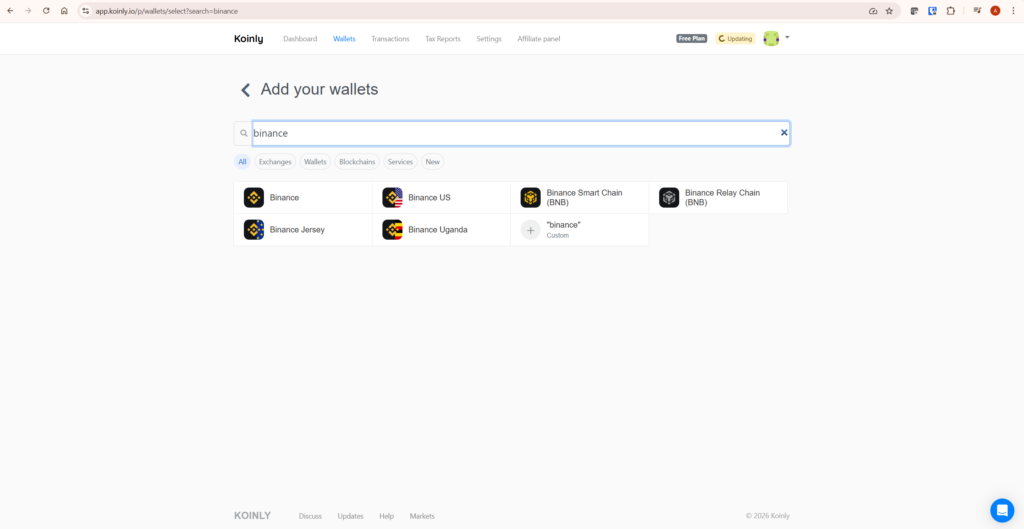
Koinly’s Binance wallet options — select Binance for standard accounts, Binance US if you are a US-based user, or Binance Smart Chain for BNB wallet activity
Step 5: Enter Your API Key and Secret Key
Paste your Binance API Key into the API Key field and your Secret Key into the Secret field. Double-check both for any extra spaces at the start or end — copy-paste errors with invisible characters are a frequent cause of “Invalid API Key” errors at this stage.
Click Save. Koinly will attempt to connect and will confirm whether the connection was successful. If it fails immediately, the most likely cause is a permissions mismatch or a copy-paste error on the Secret Key.
Step 6: Let Koinly Sync and Then Verify the Import
Once connected, Koinly begins pulling your Binance transaction history. For accounts with years of trading history this can take several minutes — larger accounts with thousands of transactions may take longer. Do not interrupt the sync.
When the sync completes, do not assume everything imported correctly. Run through this verification checklist before moving on:
Compare your total transaction count in Koinly against your Binance trading history. Check that deposits and withdrawals are present. Verify that staking or Binance Earn rewards appear and are classified as income rather than transfers. Look for any missing cost basis warnings — these indicate transactions where Koinly cannot trace the origin of a token, usually because a linked wallet or exchange has not been imported yet.
If the transaction count looks significantly lower than expected, the most likely cause is a permissions gap — return to your Binance API settings and verify that all relevant read permissions are enabled, including Futures if applicable.
For a complete walkthrough of the Koinly platform once your data is imported, our How to Use Koinly guide covers every major feature step by step — including how to review flagged transactions and resolve cost basis warnings.
How to Connect Binance to Koinly Using API: Troubleshooting Common Errors
These are the errors that appear most frequently — with specific fixes for each one so you are not left guessing.
“Invalid API Key” error. This almost always means either a copy-paste error on the API Key or Secret Key, or that the Secret Key was not copied correctly before the Binance screen was closed. The fix: go back to Binance API Management, delete the key, generate a new one, and copy both keys carefully before closing the screen. Paste directly into a plain text note first to check for extra spaces or line breaks before entering into Koinly.
Futures trades not appearing. Binance Futures requires a separate read permission that is not always enabled by default when you select Read Only. Go back to your Binance API key settings and confirm that the Futures read permission is explicitly enabled. If it is not listed separately, try creating a dedicated Futures API key and adding Binance Futures as a separate wallet in Koinly.
Missing transactions after sync. If the transaction count looks lower than expected, check two things: whether your Binance API permissions cover all the product types you have used (Spot, Margin, Futures, Earn), and whether you have sub-accounts on Binance that need to be connected separately. Sub-accounts do not inherit the parent account’s API connection — each one needs its own key and its own wallet entry in Koinly.
Duplicate transactions after switching from CSV to API. If you previously imported Binance transactions via CSV and then add an API connection, Koinly may import duplicates because it cannot automatically reconcile the two data sources. The clean fix is to delete the CSV wallet, reconnect Binance via API only, and allow a fresh sync from scratch. It takes longer but produces a clean, reliable transaction history without duplicates.
Binance Earn or staking rewards missing or misclassified. Binance Earn products — flexible savings, locked staking, BNB Vault — sometimes appear as deposits rather than income in Koinly, which affects your taxable income calculation. After syncing, filter your transaction list by the relevant time period and check that reward distributions are classified as income. If they are not, reclassify them manually in Koinly’s transaction editor.
If after all of this your gains figures still look wrong, the problem is almost always missing data from another source rather than the Binance connection itself. Our Koinly showing wrong gains guide walks through exactly how to diagnose this — including a step-by-step process for identifying which wallet or exchange is causing the discrepancy.
Security Best Practices for Your Binance API Key
A read-only API key carries minimal risk by design — Koinly cannot trade, withdraw, or move funds with read-only access. But good API hygiene is still worth maintaining, particularly as your API key list grows over time.
Create a dedicated key for Koinly and label it clearly. Do not reuse an existing API key that was created for another purpose — if you ever need to revoke access, a dedicated key lets you do so cleanly without affecting anything else. Enable IP restriction in Binance if the option is available for your account — this limits which IP addresses can use the key, adding a meaningful security layer at no cost.
Review your active API keys at least once a year and revoke any that are no longer in use. A dormant API key that you forgot about is an unnecessary attack surface. If you stop trading on Binance after a tax year and no longer need continuous syncing, revoking the key until you need it again is the prudent approach.
One question I hear often: should you revoke the API after tax season? If you continue to trade throughout the year, keep it active — the continuous sync ensures no transactions are missed when it comes time to generate your tax report. If you have stopped trading and only needed the connection for a historical import, revoke it. There is no value in keeping an active key for a connection you no longer use.
What to Do If You Use Multiple Exchanges Alongside Binance
Binance is often one of several exchanges in a crypto investor’s portfolio. If you also trade on Coinbase, Kraken, KuCoin, or use self-custody wallets like MetaMask, each source needs to be connected to Koinly separately for your tax report to be complete.
Missing even one exchange or wallet creates missing cost basis errors — Koinly cannot calculate the gain on a token if it cannot find where that token originally came from. A token that moved from Coinbase to Binance before being sold looks like a zero-cost acquisition to Koinly if the Coinbase connection is missing, which artificially inflates your reported gains.
The rule is simple: every wallet and exchange that has ever held any of your crypto assets needs to be connected. Not just your active accounts — dormant wallets, exchanges you no longer use, hardware wallets from previous years. All of them. This is the foundation of an accurate crypto tax report, and it applies to Binance users as much as anyone.
For a step-by-step guide on importing from another major exchange, see our guide to importing Coinbase transactions into Koinly — the process is similar to Binance and covers the same verification steps.
Frequently Asked Questions
Does connecting Binance to Koinly using API give Koinly access to my funds?
No — and this is the most important thing to understand about the connection. A read-only API key gives Koinly permission to read your transaction history and nothing else. It cannot place trades, initiate withdrawals, or transfer funds in any form. The read-only restriction is enforced at the Binance level — Koinly physically cannot perform any account actions beyond pulling transaction data. As long as you configure the permissions correctly in Step 3, your funds are completely safe.
How to connect Binance to Koinly using API if I trade Binance Futures?
Binance Futures requires a separate read permission that is not always included when you select the standard Read Only option. In your Binance API key settings, look for a specific Futures permission toggle and enable it alongside the standard read permission. If your Futures trades still do not appear after enabling this, try adding Binance Futures as a separate wallet in Koinly using the same API credentials — some account configurations require this approach for Futures data to import correctly.
How often does Koinly sync with Binance after API connection?
Koinly syncs automatically on a regular basis once the API connection is established. You can also trigger a manual sync at any time from the Wallets page — useful if you have just completed a large trade and want to see it reflected in Koinly immediately. For most users, the automatic sync frequency is sufficient to keep the transaction history current throughout the year without any manual intervention.
What should I do if my Binance API key stops working in Koinly?
API keys can stop working for several reasons: Binance may have expired the key due to inactivity, your account security settings may have changed requiring key regeneration, or an IP restriction may have blocked the connection. The simplest fix in most cases is to go to Binance API Management, delete the existing Koinly key, create a fresh read-only key with the same permissions, and update the credentials in your Koinly wallet settings. This takes under five minutes and resolves the majority of API failure issues.
What to Do Next
Once your Binance connection is live and you have verified the import, the next step is to connect every other exchange and wallet in your portfolio using the same process. Run through the verification checklist for each one — compare transaction counts, check for missing cost basis warnings, and confirm that reward income is classified correctly. Only once all sources are connected and verified should you generate your tax report.
For a complete picture of how Koinly handles all transaction types — including DeFi, NFTs, staking, and multi-chain activity — our full Koinly review covers the platform in detail, with an honest assessment of where it excels and where manual review is still required.
For most crypto investors managing more than 100 transactions, Koinly is worth the cost. Explore Koinly’s plans here — and start with the free import to confirm your Binance data is pulling correctly before committing to a paid report.